Double scanning technique in case of full edentulous. Initial situation – full maxilla edentulous.

It is known that one of the stages of surgical guide creation is aligning of the computer tomography scan and the jaw surface scan data. In case of full edentulous, the crowns, as reference points for alignment, are absent.
Therefore, different X-ray contrast guides and markers are used.
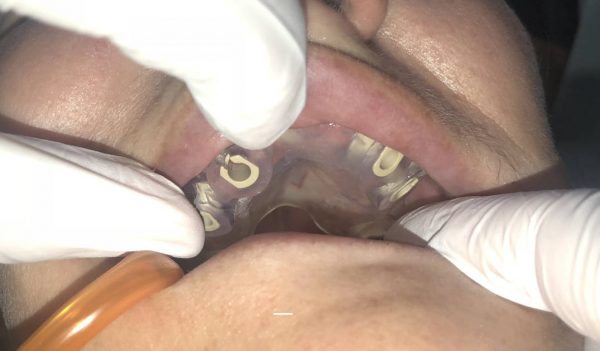
In this case, the X-ray contrast markers (metal balls) were placed on the patient’s existing prosthesis. Also, the prosthesis was rebased for a more accurate fit to the mucosa.
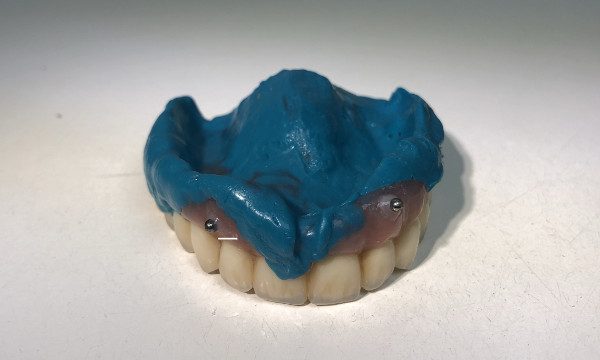
The first scanning – CT scan, was performed with a prepared prosthesis in the patient’s mouth.
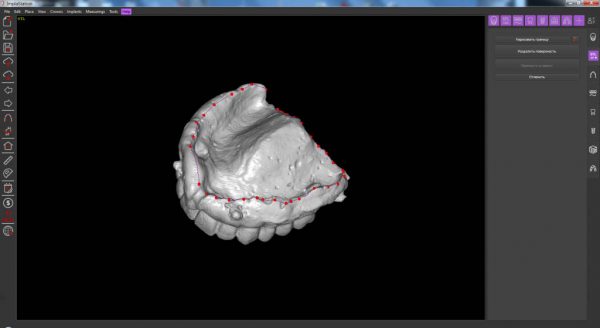
The second scanning – a prosthesis with marks was scanned in an optical scanner.
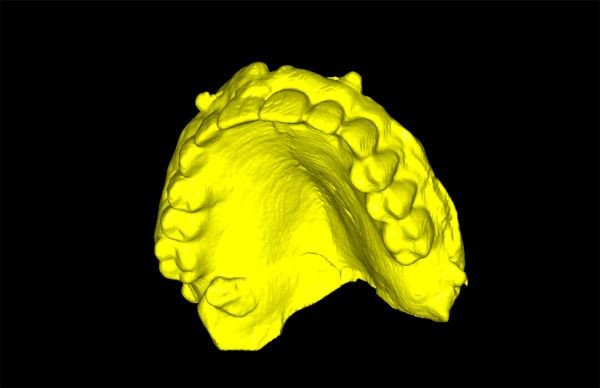
In case there is no optical scanner, the prosthesis can be scanned in a computer tomograph with the subsequent conversion of the prosthesis DICOM-file into STL file.
The scan will be exactly the same as for optical scanning. The accuracy of optical scanning is usually from 7 to 20 microns, the scanning accuracy in a tomograph is about 100 microns (the voxel size).
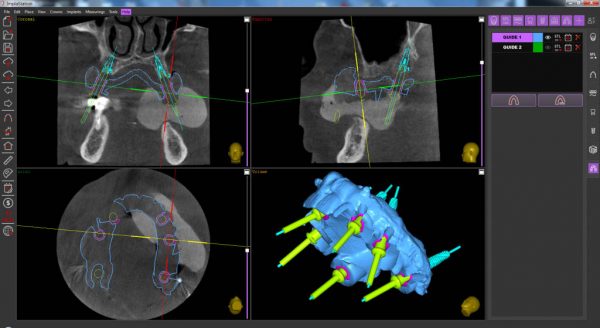
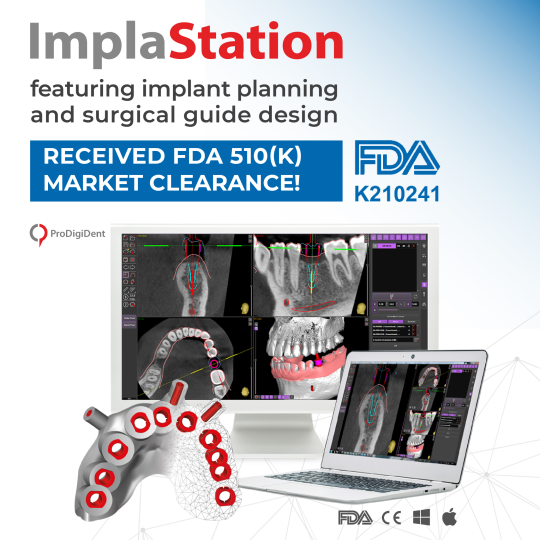
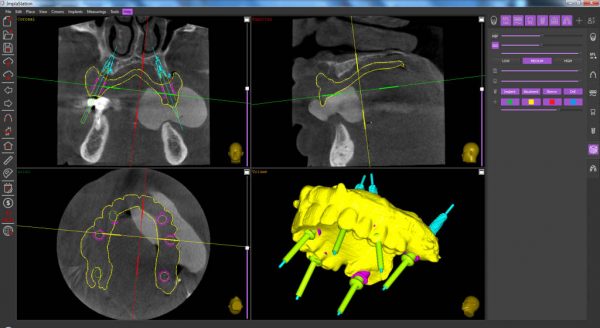
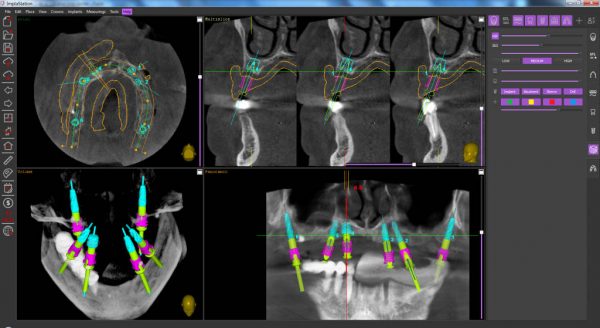
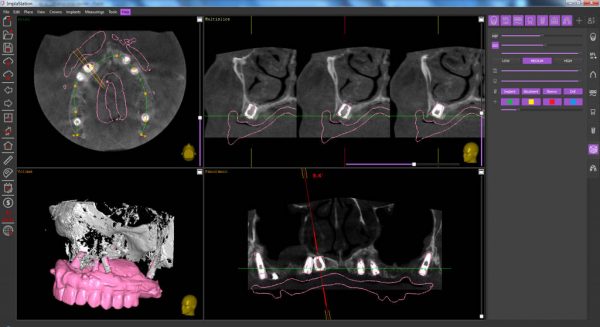
The scans are matched in free software for implant planning and surgical guides creation Implastation. The alignment was performed by X-ray contrast marks.
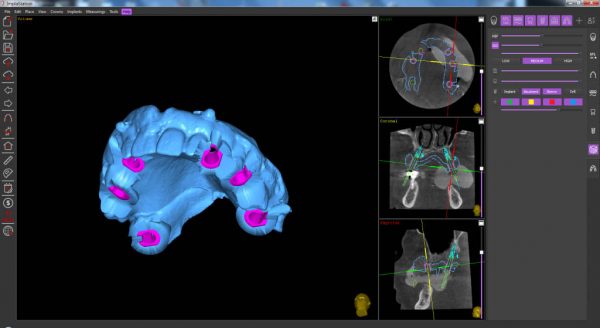
The prosthesis scan, placed according to the marks, showed the position of the mucosa.
Also, the prosthesis scan was used as a wax-up !!!
The implants were placed taking into account the limited bone supply and the requirements of prosthetic driven implantation (desired crowns positions).
Using special functions of the software, the prosthesis scan as a “hermetic body” was divided into two surfaces – occlusal (blue) and a prosthetic bed (red).
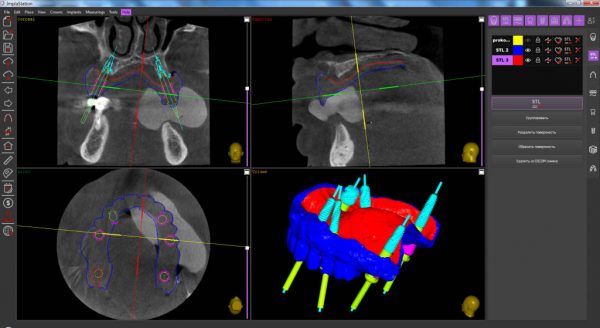
After that a surgical guide was generated at the mucosa surface (red scan). Fixing pins were not used.
All implants, with the exception of a 6.0 mm diameter implant, were installed through the holes of a surgical guide with the sleeves removed. The implant driver was not adapted to the diameter of the guide holes and was positioned visually.
A wider implant was placed in a previously prepared well, with the guide removed.
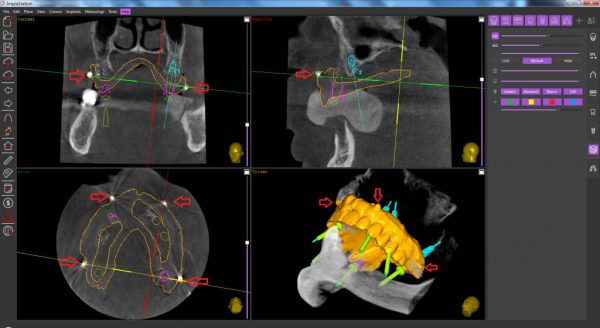
It can be seen on the control CT that all the implants are placed quite accurately with respect to the planned position. The wider implant has slightly shifted in one of the planes due to the uncontrolled (without the guide) twisting into a very soft bone.
For planning were used: free ImplaStation software, universal surgical kit for guided surgery ProDigiDent Mistral 2, PEEK guide sleeves ProDigiDent Mistral with lateral cut.
The guide was printed on a Formlabs Form 2 printer.
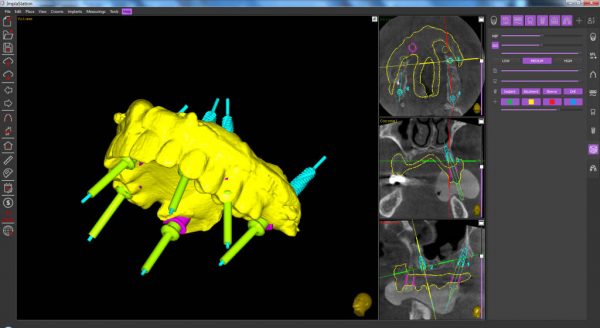
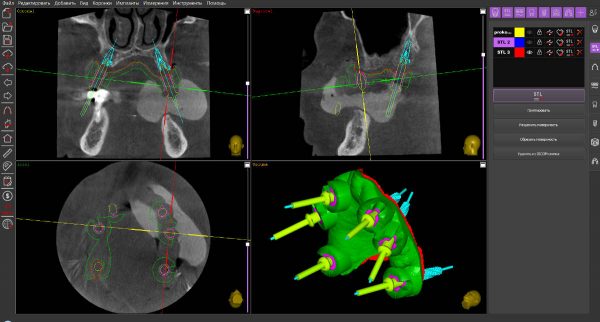
ImplaStation software also allows to create a surgical guide based on the second scan (prosthesis scan) without dividing the surfaces.
In this case, the guide would look like this: