While planning an implantation with surgical guides, the question arises: for what tools should a guide be created and which tools to work with?
The most frequent questions that we receive to our mail are:
- Which tools do we need to use for an implantation with guides?
- Where to begin?
The drills for guided surgery are specific and different from the usual ones:
- they are longer
- they have stopper
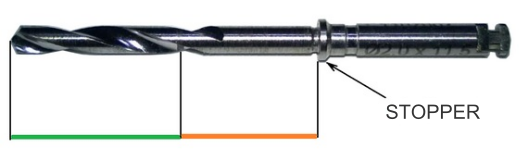
fig. 1
On fig. 1, the part of the drill, which is immersed into a bone while drilling, is marked in green , and orange – is the technological part, that remains in the mucosa and the guide sleeve. The depth of drilling is controlled by a stopper.
There are some options of the tool sets:
1. The simplest version: a pilot drill + a universal rearrangeable spoon (fig. 2)
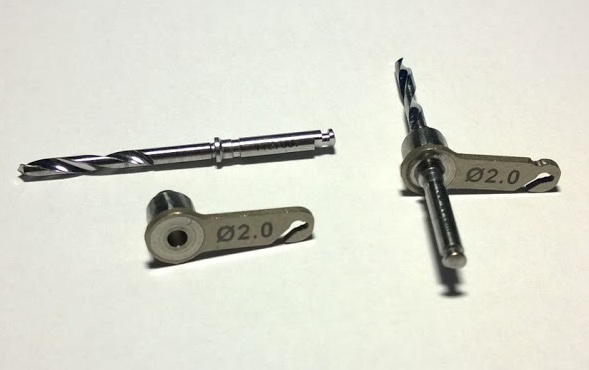
fig. 2
The spoon is useful for the beginners in the implantology. The advantages of this solution are: small investments, multipurpose, no need to glue the sleeves. The disadvantages – a spoon should be held during the work, it can be uncomfortable to place it in the mouth of the patient.
2. More convenient option: pilot drill + guide sleeves (fig.3)
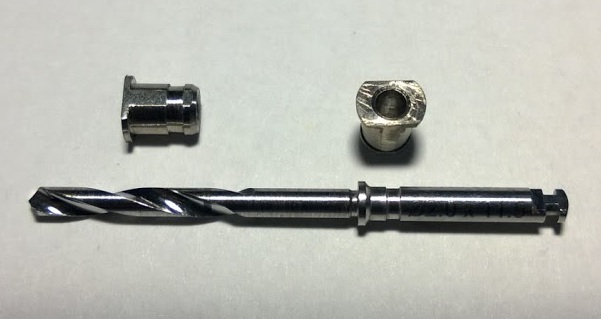
fig.3
Pros:
- the work is easier and faster
- better visibility, higher accuracy
Cons are insignificant – it is necessary to get as many sleeves as implants will be installed. Of course, the sleeves are not disposable and can be reused in other guides. There is a serious limitation in this case – the guide is made for a certain, usually pilot, drill. To implement the complete drilling protocol, you have to make several guides. The full protocol guides for drilling can be done using the telescopic sleeves. There is an example of Bredent sleeve. (fig. 4)
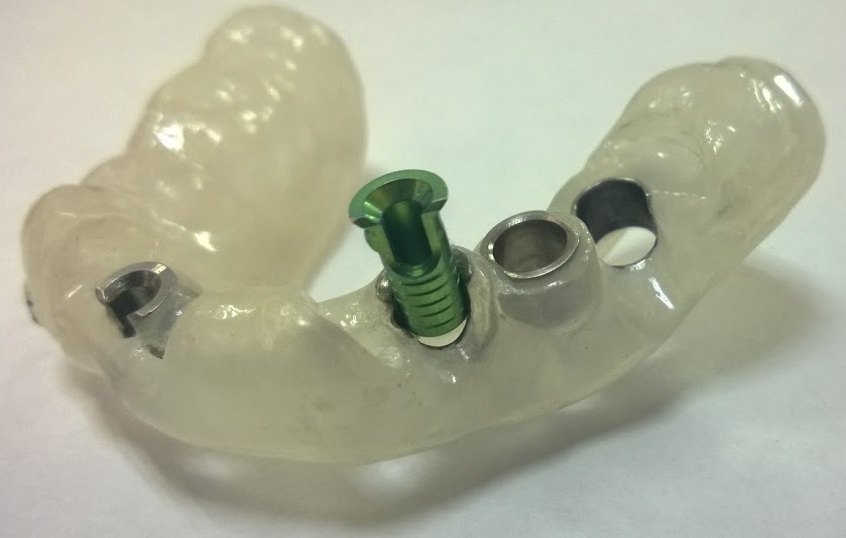
fig. 4
The inner sleeves for the pilot drills are installed and “snapped” into the outer sleeve. Then the inner sleeves are replaced by the sleeves with a larger internal diameter. The diameter of the outer sleeve corresponds to the diameter of the largest, in the surgical set, drill. There were pluses. Minuses are – there is a gap between the inner sleeve and the outer one in this system. Also, there is always a backlash between the drill and the inner sleeve. Accordingly to this the drilling accuracy is reduced. Due to the contact of the cutting surface of the drill with the sleeve, comes out the deterioration of the sleeve and the drilling accuracy is reduced.
3. More accurate drilling system. It consists of different drills with different diameter of the cutting part, but with the same guide part + of the universal guide sleeve.
Pay attention – the smooth guide part of all the drills are the same (fig. 5). That is why the sleeves are not worn out, the gaps are smaller, the accuracy is increased and the complete drilling protocol is possible.
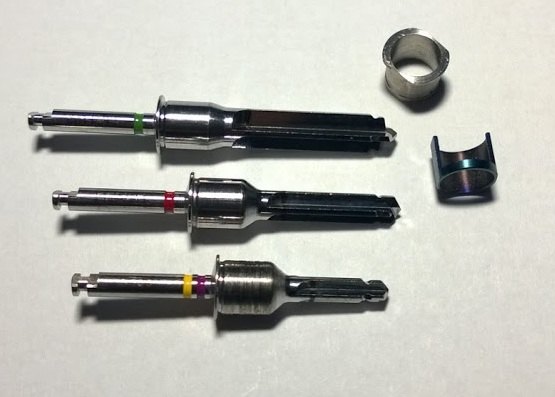
fig. 5
According to the doctor’s wishes, only the initial drills for pilot drilling or the complete set can be purchased (fig.6)
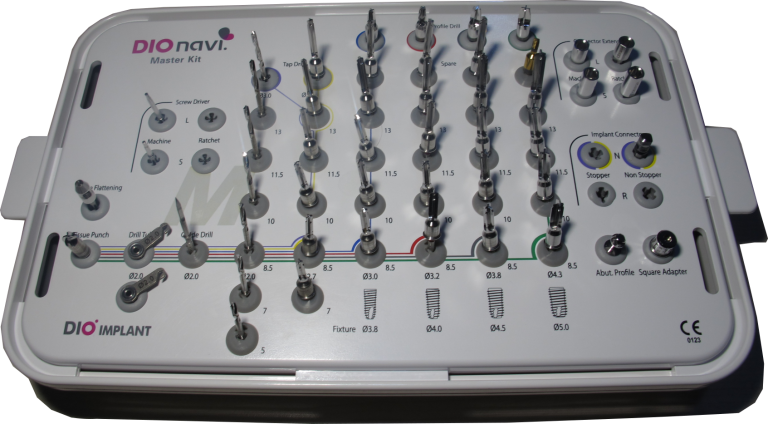
fig.6
Implantation kits with guides of this type allow the complete drilling protocol, bone condensation and implant installation through the guide sleeve. Unfortunately, this type of kits for guided surgery so far have been announced only by some implant manufacturers. Therefore, it is not possible to implement the complete drilling protocol for all implants.
But it is possible to make accurate and predictable setting of implants of any system by use of pilot drills from this set, and then, “native” profile drills.
Pros: one of the most accurate systems. It is possible to control the performance, mostly during the all stages of various surgical protocols.
Cons: you need to buy 4-6 drills or complete set.
TO ALL ARTICLES